Setting OneNote LAN Notebook for edit or read
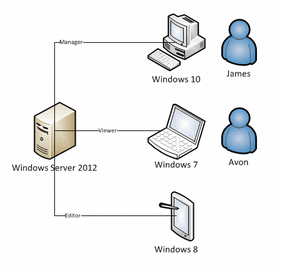
In this experience, we use 3 computers to cooperation with OneNote.
Computer 1, Windows server 2012, used to store LAN OneNote notebook.
Computer 2, Windows 10, Create and manager LAN OneNote notebook.
Computer 3, Windows 7, Read only the LAN OneNote notebook.
Computer 1, Windows server 2012, used to store LAN OneNote notebook.
Computer 2, Windows 10, Create and manager LAN OneNote notebook.
Computer 3, Windows 7, Read only the LAN OneNote notebook.
Computer 1, Windows Server 2012 - LAN Notebook Storage
We use a server to store LAN OneNote notebook.
We use a server to store LAN OneNote notebook.
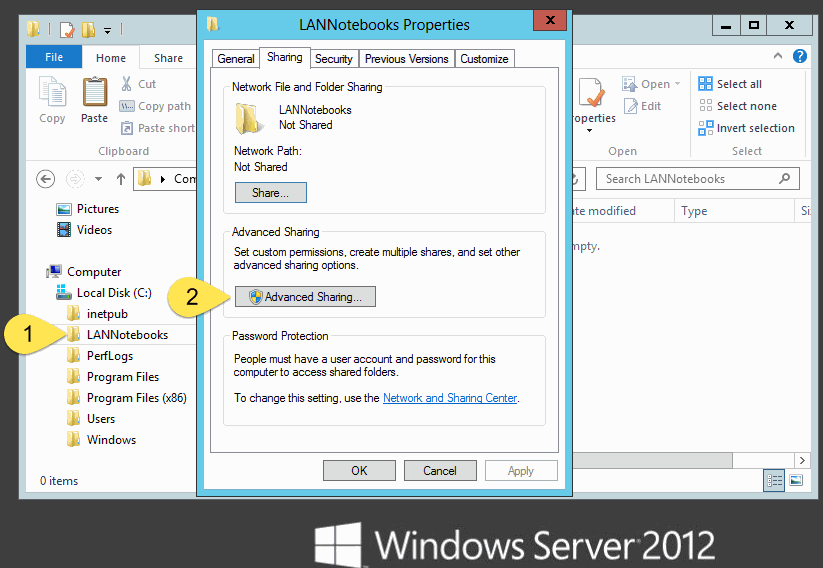
- Create a folder: C:LANNotebooks
- Right click the folder, choose the item "Properties" on context menu.
- Click the "Advanced Sharing" button on "Sharing" tab.
Share the folder for all users read-only
On the "Advanced Sharing" Dialog
On the "Permissions for LANNotebooks" Dialog
On the "Select Users or Groups" Dialog
On the "Select user or Groups" ( Advance )
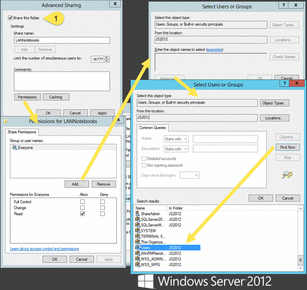
On the "Advanced Sharing" Dialog
- Check "Share this folder".
- Click "Permissions" button.
On the "Permissions for LANNotebooks" Dialog
- Click "Add" button.
On the "Select Users or Groups" Dialog
- Click "Advance" button.
On the "Select user or Groups" ( Advance )
- Click "Find Now" button.
- Choose "Users" group in Search Result.
Setting Permissions
Share the folder for user "James" full control
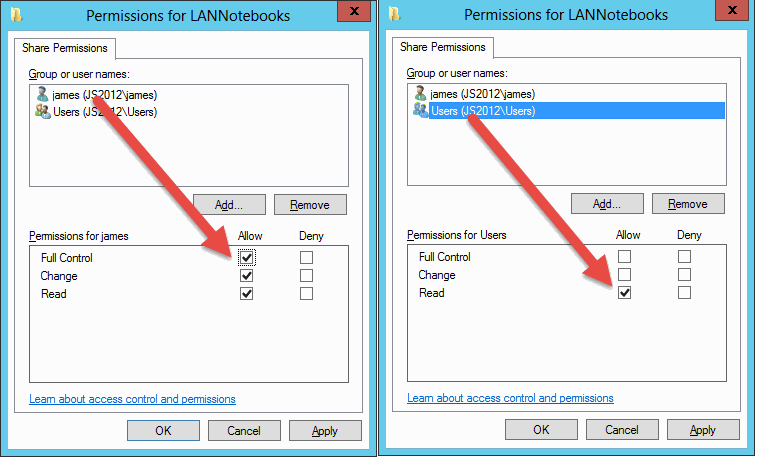
Like add "Users" group, and next add nother user "James" and set the permission: Full Control, Change, Read.
- Setting the "Users" group permission: Read.
Share the folder for user "James" full control
Like add "Users" group, and next add nother user "James" and set the permission: Full Control, Change, Read.
Windows 10, OneNote 2013 - Owner User for LAN Notebook
Login user "James", create LAN Notebook.
Login user "James", create LAN Notebook.
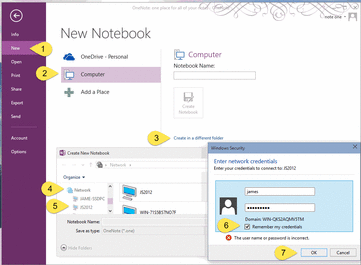
- In OneNote, "File" tab -> "New" item.
- New Notebook on "Computer".
- "Create in a different folder".
- Click "Network" in "Create New Notebook" dialog.
- Choose the "JS2012" Windows Server. It will pop up a login dialog if you have never login before, input "james" user name and password.
- Check the "Remember my credentials".
- Click "OK" button.
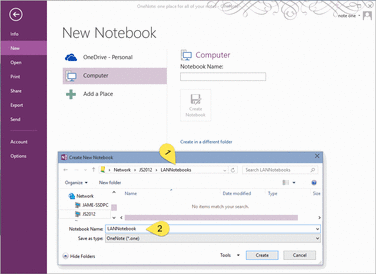
- After login to Windows Server 2012, go to the folder "LANNotebooks".
- Input "LANNotebook" in Notebook Name box.
- Click "Create", and OneNote create a Notebook in Windows Server 2012.
Setting the LAN Notebook Permission for Read-Only User
After create LANNotebook in Windows Server 2012, now we can set user with read-only permission for LAnNotebook.
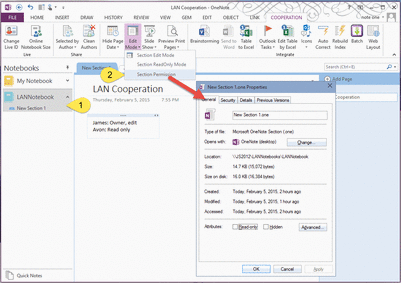
It will pop up section Preperties dialog.
After create LANNotebook in Windows Server 2012, now we can set user with read-only permission for LAnNotebook.
- in Onenote, Choose "LANNotebook".
- Click "Gem for OneNote" add-ins "Cooperation" tab -> "Edit Mode" menu -> "Section Permision.
It will pop up section Preperties dialog.
On Section Properties Dialog
On Permissions for Section Dialog
On Select Users or Groups Dialog
On Select Users or Group Dialog ( Advanced )
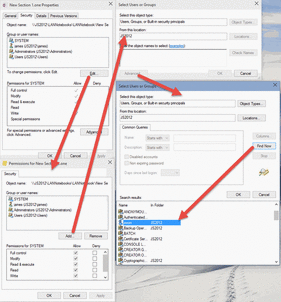
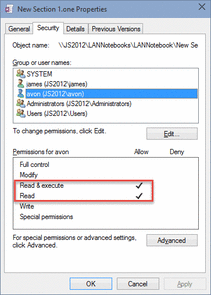
- Click security tab -> "Edit" button.
On Permissions for Section Dialog
- Click "Add" button.
On Select Users or Groups Dialog
- Click "Advanced" button.
On Select Users or Group Dialog ( Advanced )
- Click "Find Now" button.
- Choose the user "avon" for read-only user.
Set permissions for avon : Read
Windows 7, OneNote 2010 - Read-Only User for LAN Notebook
After setting "avon" user for LANNotebook, we can use "avon" user to login Windows Server 2012 and open LANNotebook for read-only.
After setting "avon" user for LANNotebook, we can use "avon" user to login Windows Server 2012 and open LANNotebook for read-only.
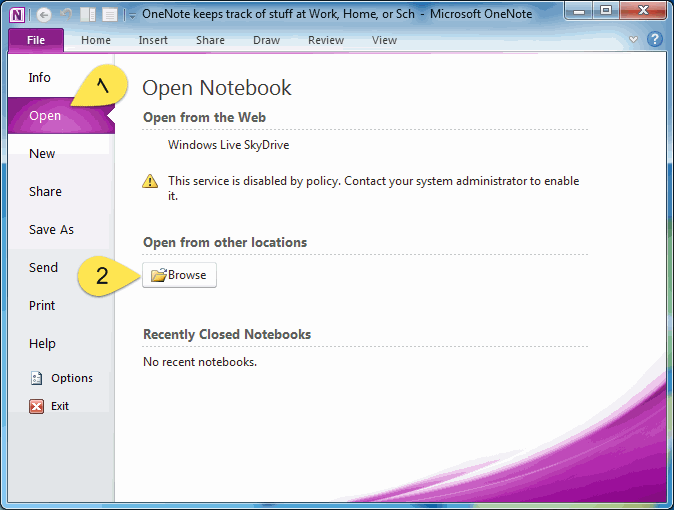
- In OneNote, Click "File" tab -> "Open" item.
- Click "Browse" button.
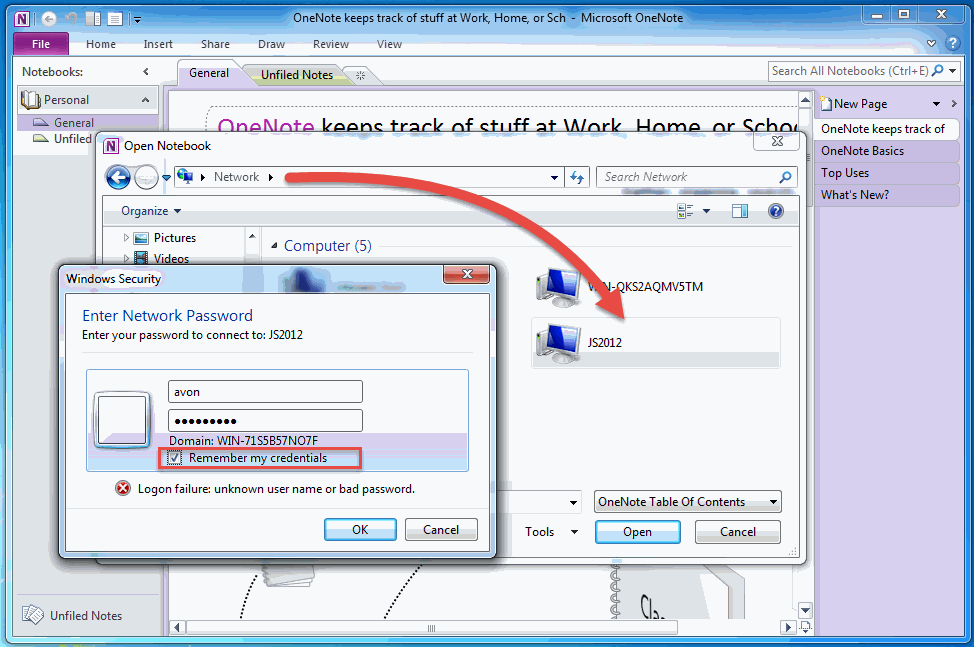
In Open Notebook Dialog
1. Login
Browse "Network" -> "JS2012" ( Windows Server 2012 ). It will pop up Windows Security dialog. Input the user "avon" name and password, and check "Remember my credentials". Click "OK" button to log in Windows Server 2012.
1. Login
Browse "Network" -> "JS2012" ( Windows Server 2012 ). It will pop up Windows Security dialog. Input the user "avon" name and password, and check "Remember my credentials". Click "OK" button to log in Windows Server 2012.
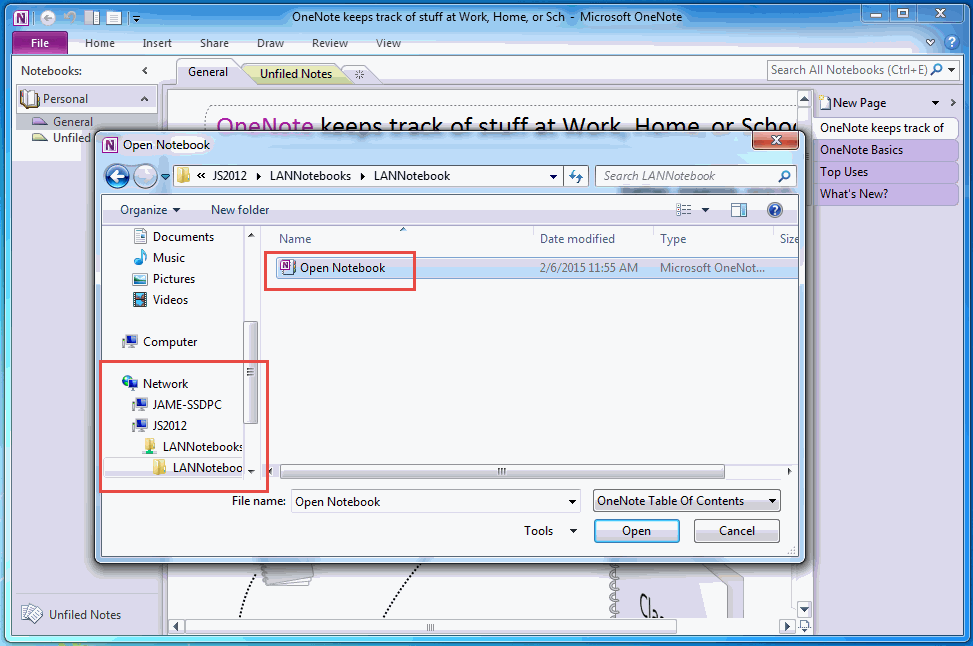
Open "Open Notebook.onetoc2"
Go to "\JS2012LANNotebooksLANNotebook", choose "Open Notebook.oneto2" to Open LANNotebook.
Go to "\JS2012LANNotebooksLANNotebook", choose "Open Notebook.oneto2" to Open LANNotebook.
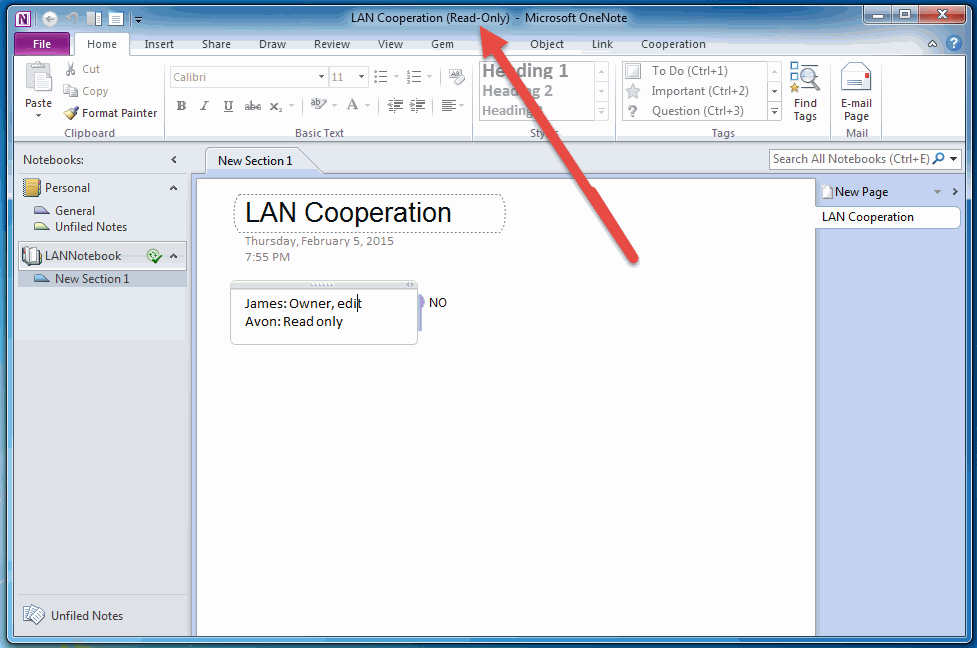
After open LANNotebook, we can find title with (Read-Only). You can read this section, but cannot write in it.
