Mac: View Original Size Image and Crop Image in OneNote
2019-11-22 11:09
Gem Menu for Mac OneNote offers "Crop Image" feature for OneNote for Mac.
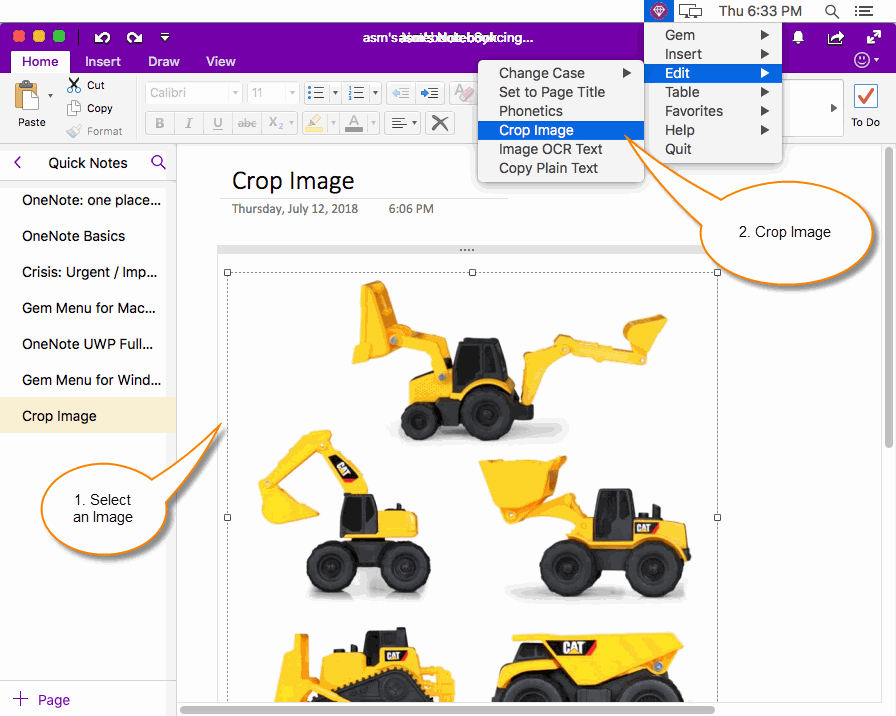
Select an Image in Mac OneNote, Click "Crop Image" of Gem Menu
- At first, select an image in current page of Mac OneNote.
- Then, click "Gem Menu" in Mac Menu bar -> "Edit" menu -> "Crop Image" menu item.
Click "Crop Image" Button in "Crop Image" Window
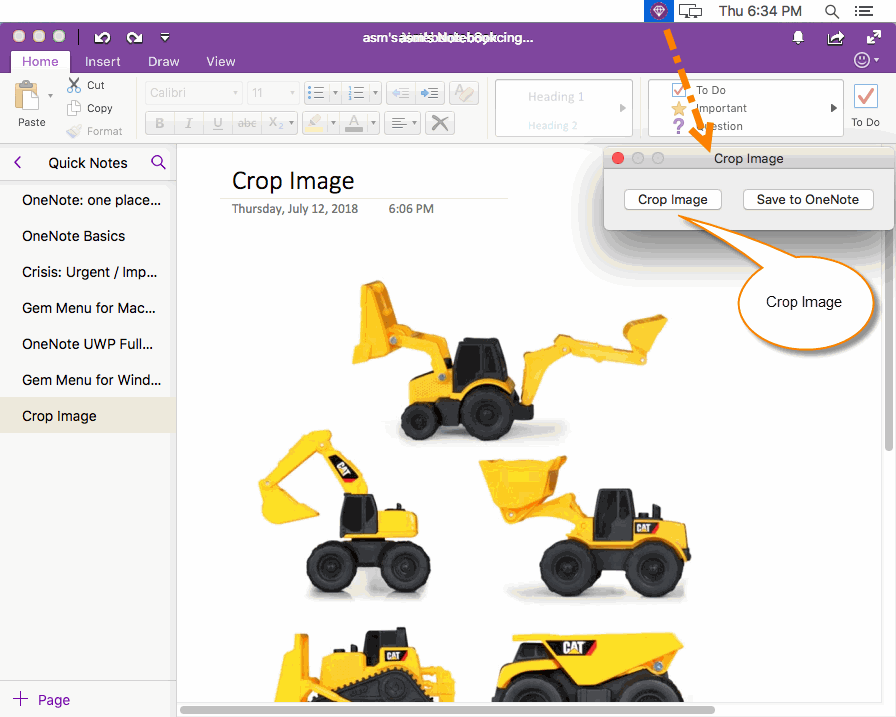
In pop up "Crop Image" window, click "Crop Image" button.
In pop up "Crop Image" window, click "Crop Image" button.
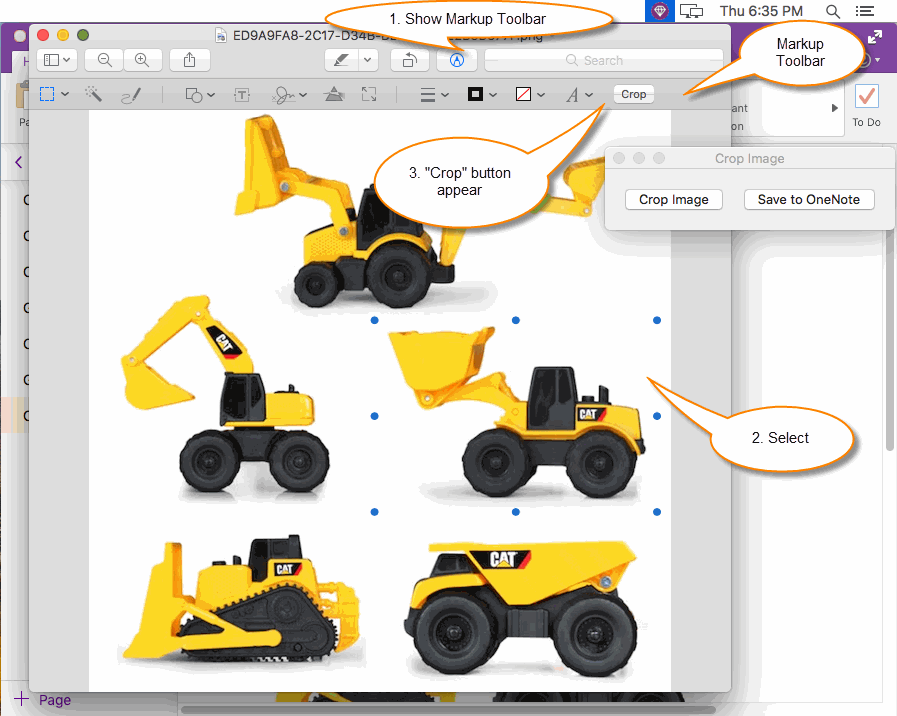
Click "Crop" Button, and Close Preview Window
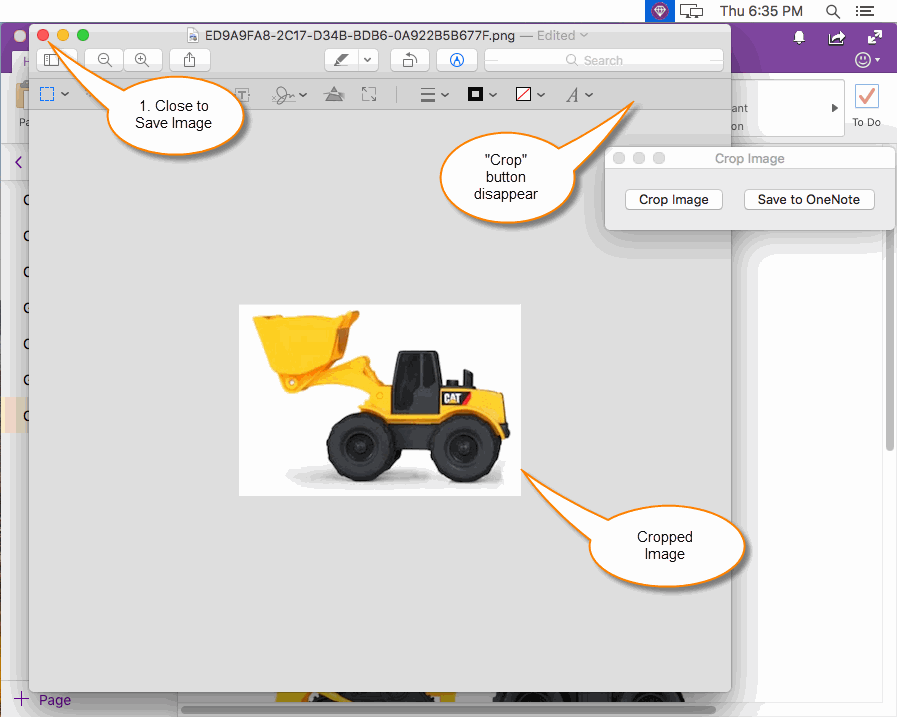
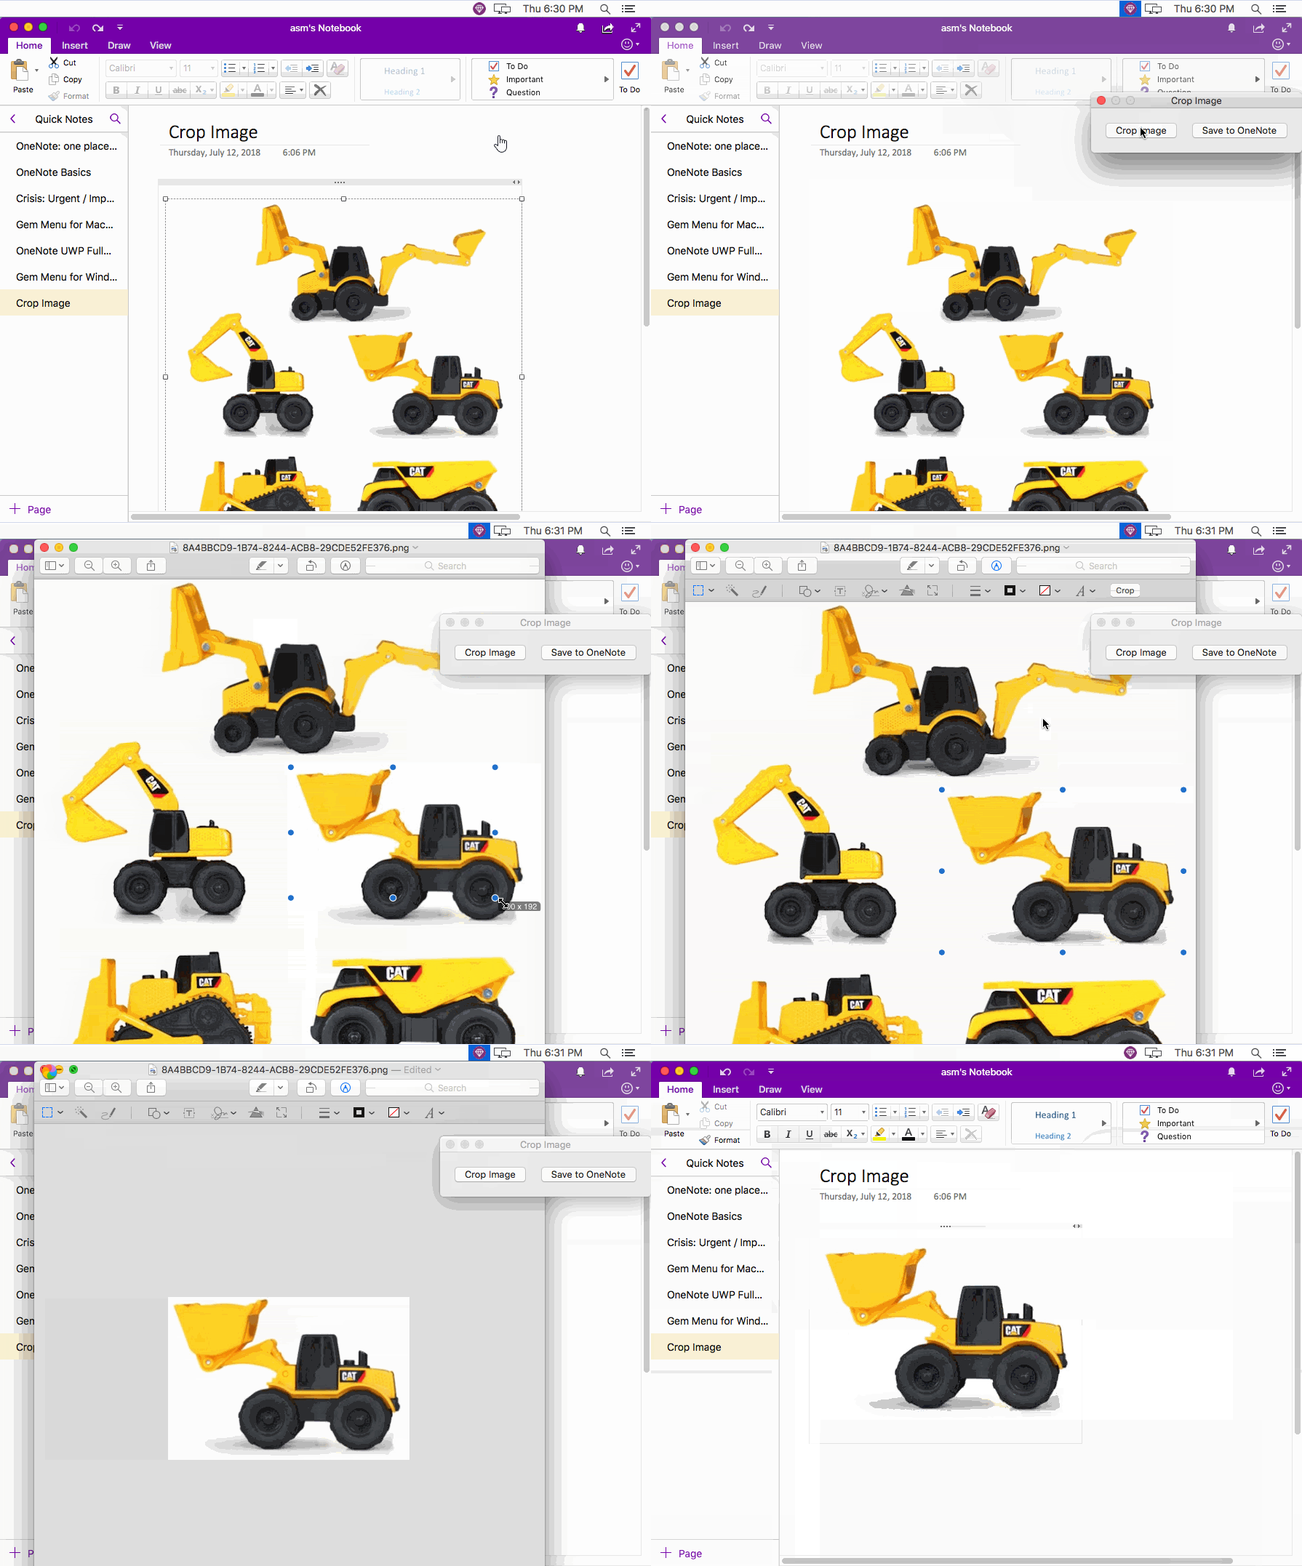
- Click "Crop" button, it will crop the image and show the cropped image.
- Then, click "Close" button left top of the Preview window.
Save Cropped Image to OneNote
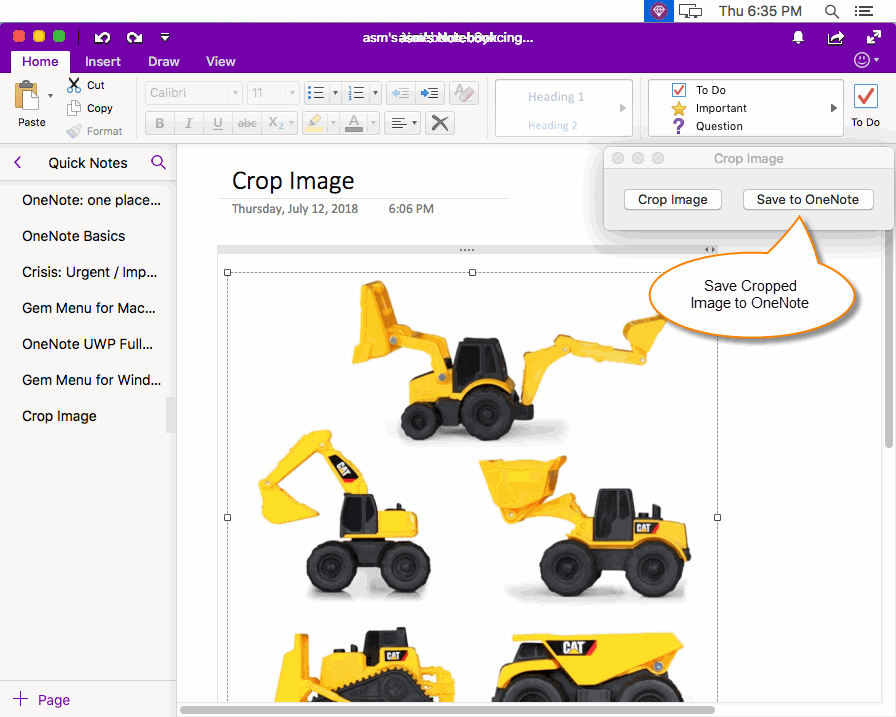
After close Preview window, click "Save to OneNote" button in "Crop Image" window. It will save the cropped image to OneNote.
After close Preview window, click "Save to OneNote" button in "Crop Image" window. It will save the cropped image to OneNote.
Cropped Image Shown in Mac OneNote
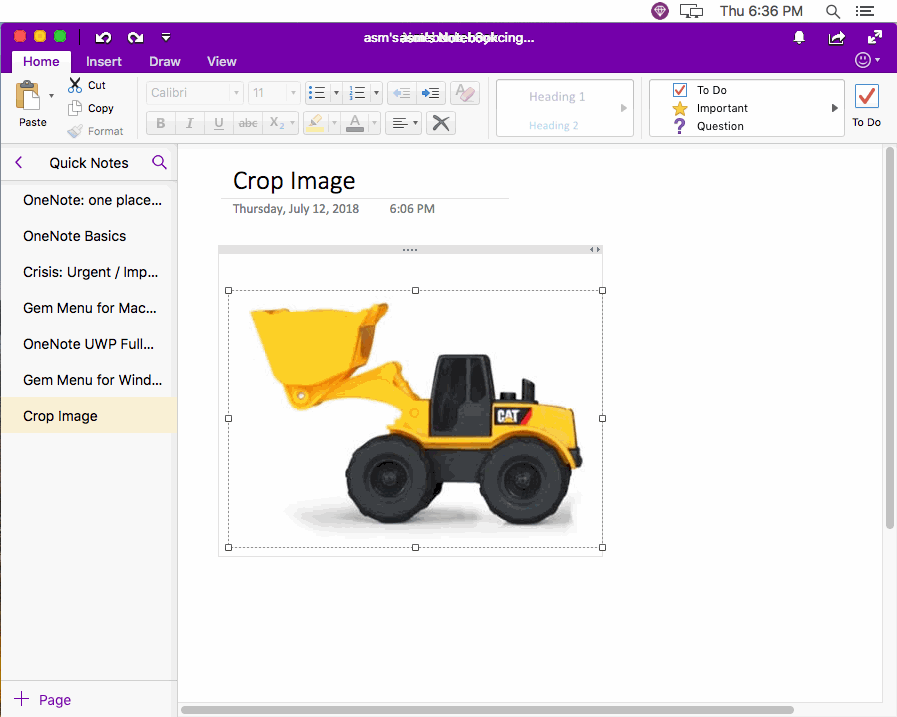
Follow picture is the cropped image is shown in Mac OneNote.
Follow picture is the cropped image is shown in Mac OneNote.
Demonstration
 Show Markup Toolbar" button to show/hide Markup bar.