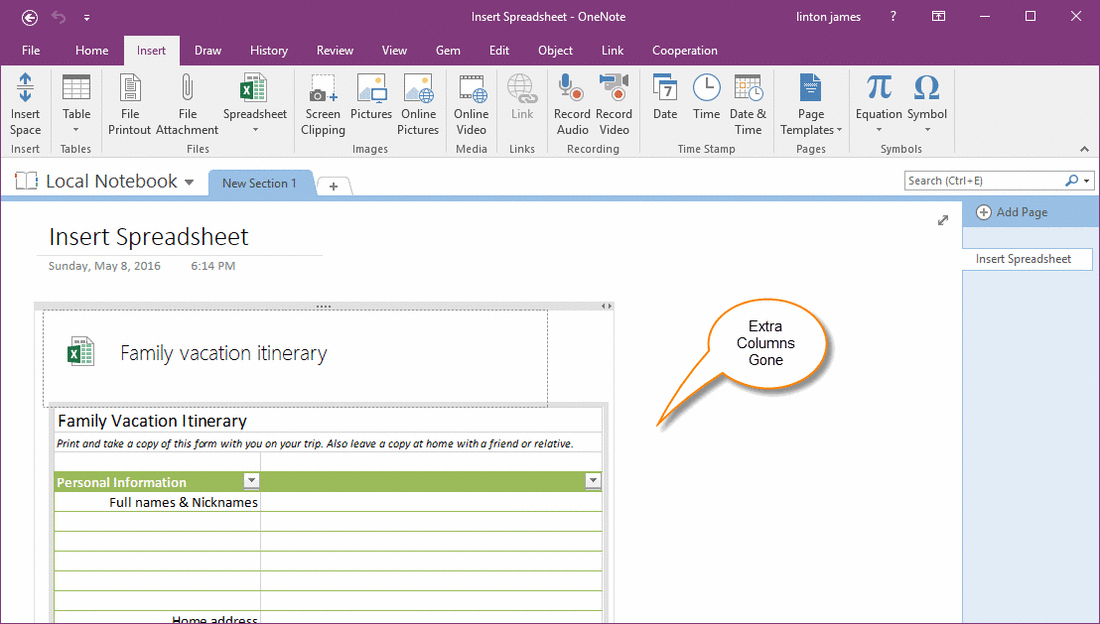
How to remove extra empty columns display in Excel spreadsheet in OneNote
Extra Empty Columns Display in Spreadsheet in OneNote
OneNote can insert Excel spreadsheet from 2013 version.
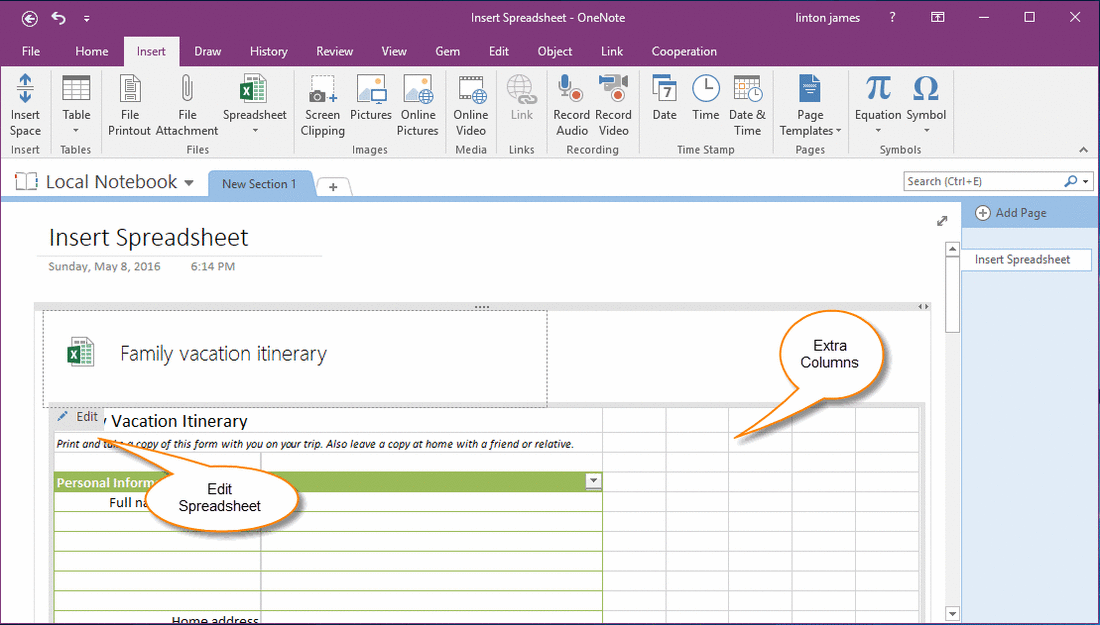
But it has some extra empty columns display on the right of spreadsheet, they take up a lot of space on page.
OneNote can insert Excel spreadsheet from 2013 version.
But it has some extra empty columns display on the right of spreadsheet, they take up a lot of space on page.
How to remove these extra columns?
We can edit this spreadsheet by Excel to remove these extra columns.
Click "Edit" button on spreadsheet in OneNote, it will open this spreadsheet using Excel.
Edit Spreadsheet to Remove Empty Columns
To make these extra columns don't show on OneNote, we need to hide the empty columns in Excel.
Select all Empty Columns on Right Side
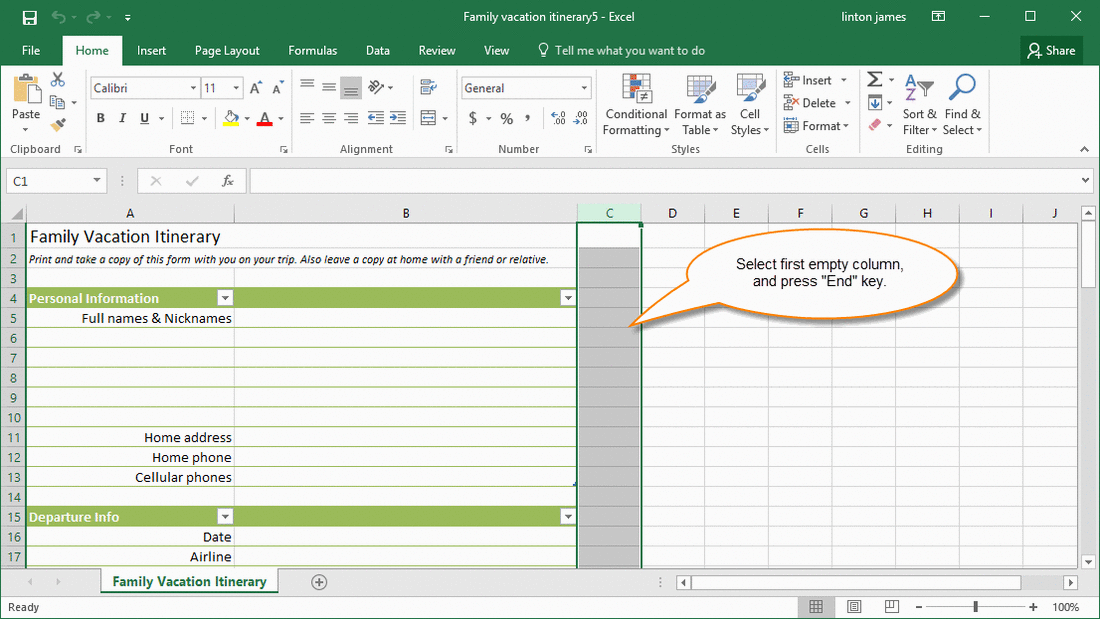
1. Select first empty columns.
2. Press "End" key.
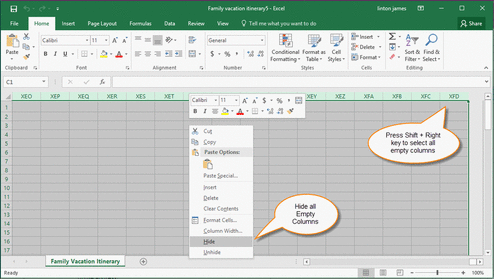
3. Press Shift + Right key
Hide all Empty Columns
Right click on selected empty columns, click "Hide" item on pop up menu. Excel hide the selected columns.
Right click on selected empty columns, click "Hide" item on pop up menu. Excel hide the selected columns.
Extra Empty Columns Disappear
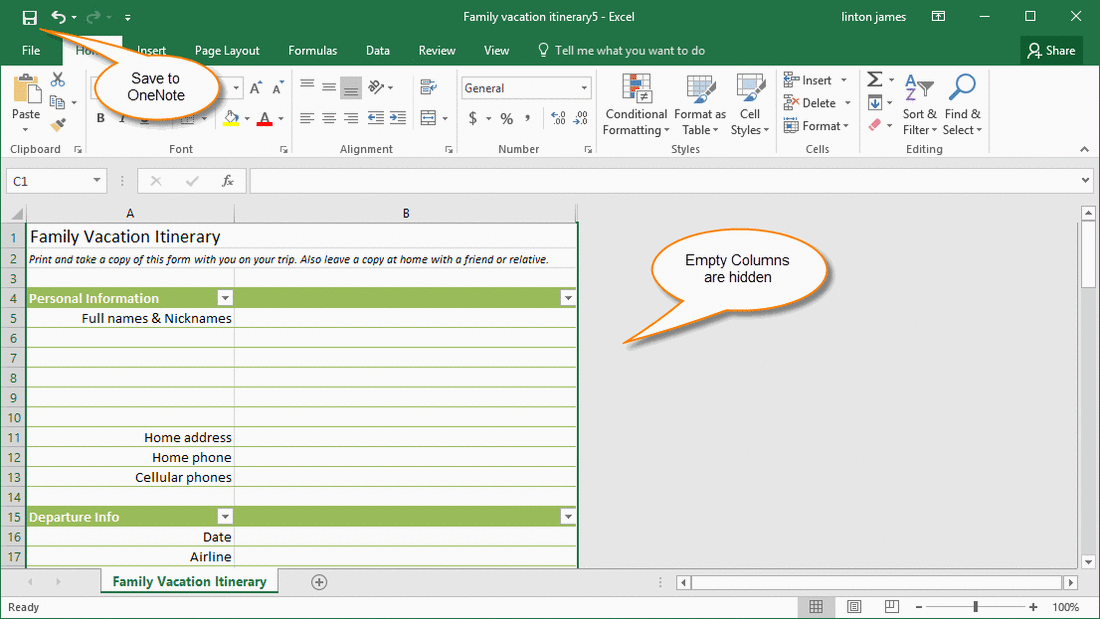
In Excel, click "Save" button to save the spreadsheet back to OneNote.
Return back to OneNote, we can see the extra empty columns have gone.
In Excel, click "Save" button to save the spreadsheet back to OneNote.
Return back to OneNote, we can see the extra empty columns have gone.
