How to install the XPS Viewer app to view xps or oxps files on Windows 10?
2022-04-22 15:07
If you're running the Windows 10 April 2018 Update, this is how you can get back support for XPS files.
XPS is a file format that Microsoft created to print content to a file very similar to PDF. It was originally introduced with Windows Vista, and even though it never really gained popularity it continued to ship with Windows 7, Windows 8.1, and Windows 10.
Now, starting with the April 2018 Update (version 1803), Microsoft is finally retiring support for the file format and removing the XPS Viewer app on new installations. This means that if you're doing an in-place upgrade from version 1709 (Fall Creators Update) to version 1803, you'll continue to have support for the format, but if you're setting up a new device, or do a clean installation, the XPS Viewer app will no longer be available.
If you're among those people who still use XPS files, and you can no longer find the app, you can get the XPS Viewer back using the Settings app.
In this Windows 10 guide, we'll walk you through the steps to re-install the XPS Viewer app since it's no longer available after installing the April 2018 Update.
How to install the XPS Viewer app on Windows 10
In order to install the XPS Viewer app on Windows 10, do the following:
1. Open Settings.
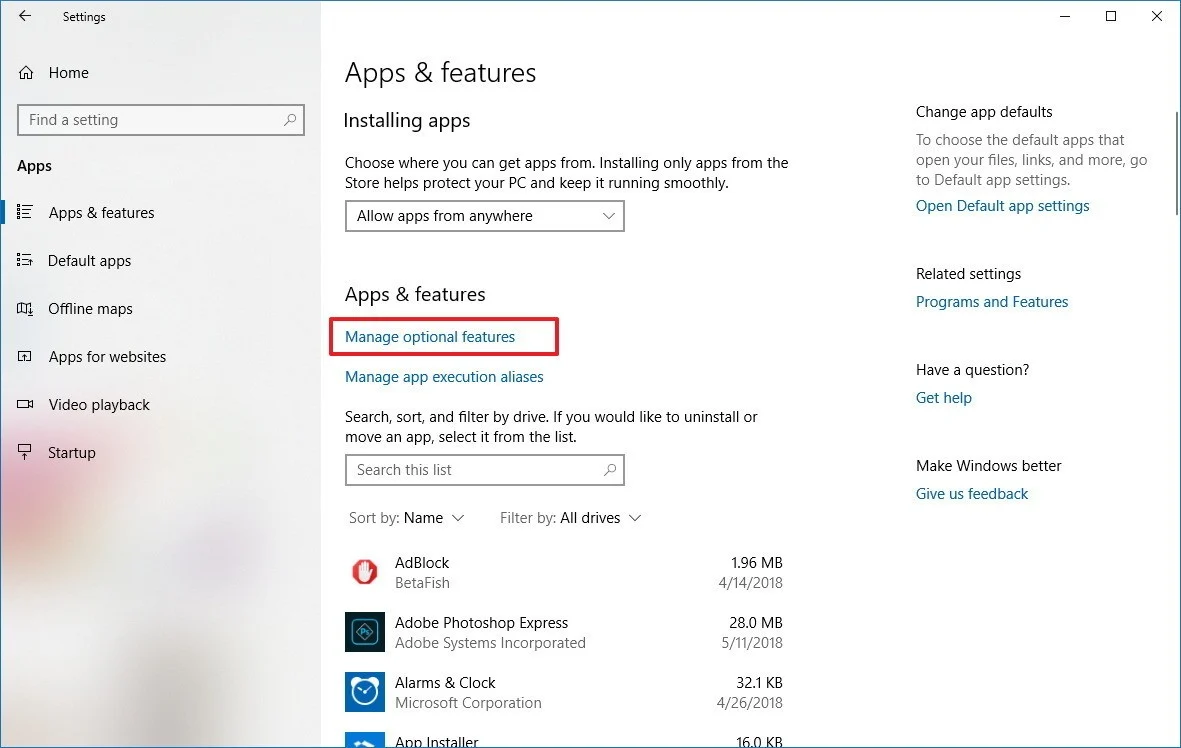
2. Click on Apps.
3. Click on Apps & features.
4. Under "Apps & features," click the Manage optional features link.
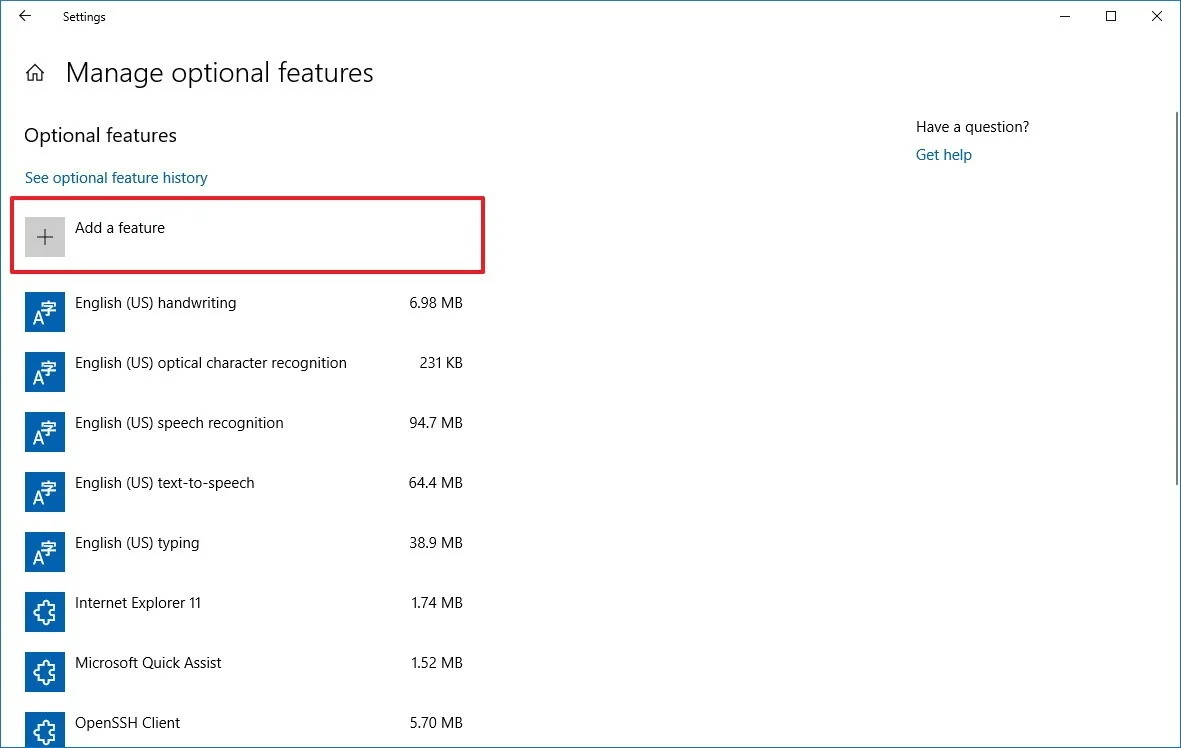
5. Click the Add a feature button.
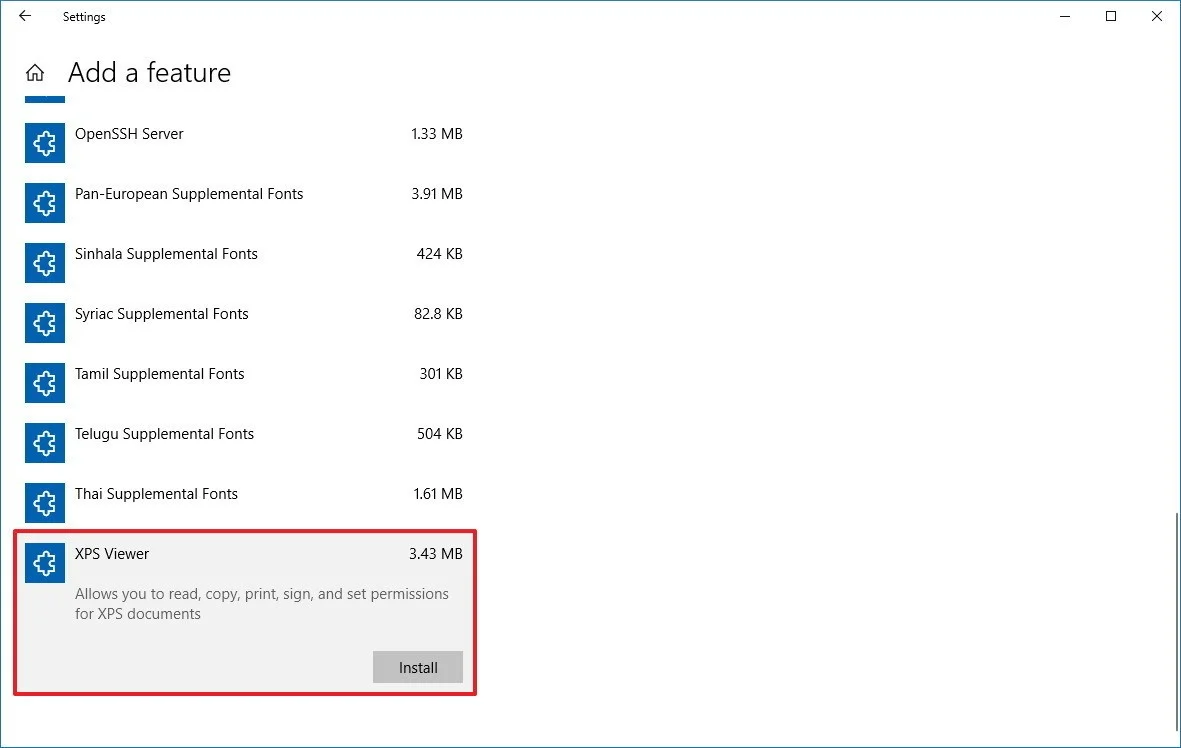
6. Select XPS Viewer from the list.
7. Click the Install button.
After completing the steps, the XPS Viewer will install on your computer, and you'll once again be able to open files stored on your computer using this file format.
| EXE Addins | Cloud Addins | MAC Addins |


