How to Create a Local OneNote Notebook and Open Its Windows Folder?
2021-02-03 11:37
Create OneNote Local Notebook
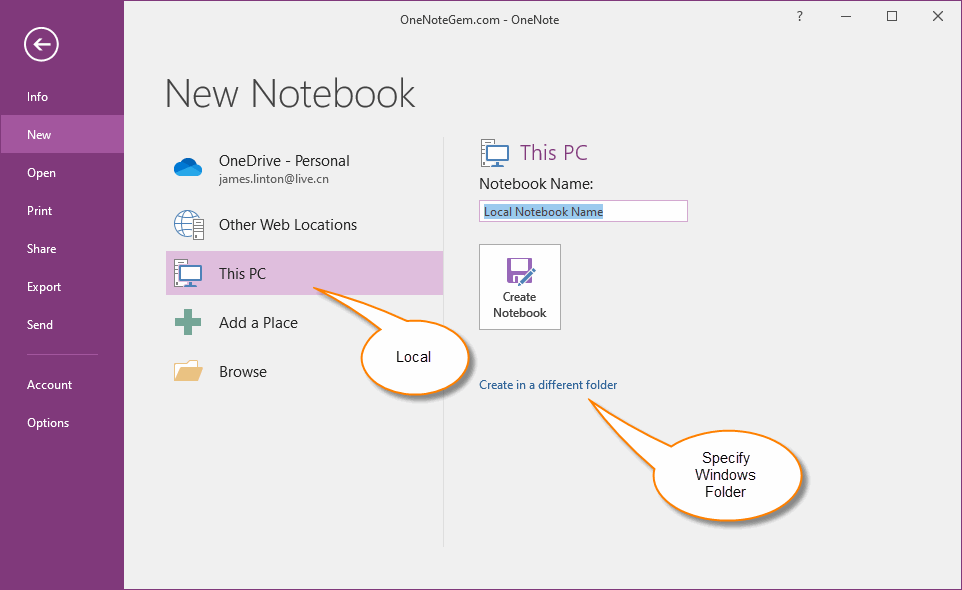
Click OneNote 2016 “File” tab -> “New”.
- Choose “This PC”.
- Input the local notebook name in “Notebook Name:”
- If you want to specify a Windows folder on your hard drive to store the notebook, you can click on the link "Create in a different folder."
- Finally, click the BIG button “Create Notebook”.
OneNote 2016 will create a local notebook which saved in your local disk.
Tip:
Specify a folder, you can specify a sync folder to a hard disk, or USB stick.
- Specified to the network disk folder (like Google Drive, Dropbox …), you can sync your OneNote notebook to multiple computers using the network disk.
- Specify to a USB stick, which you can plug in and out of multiple computers to synchronize your notebook.

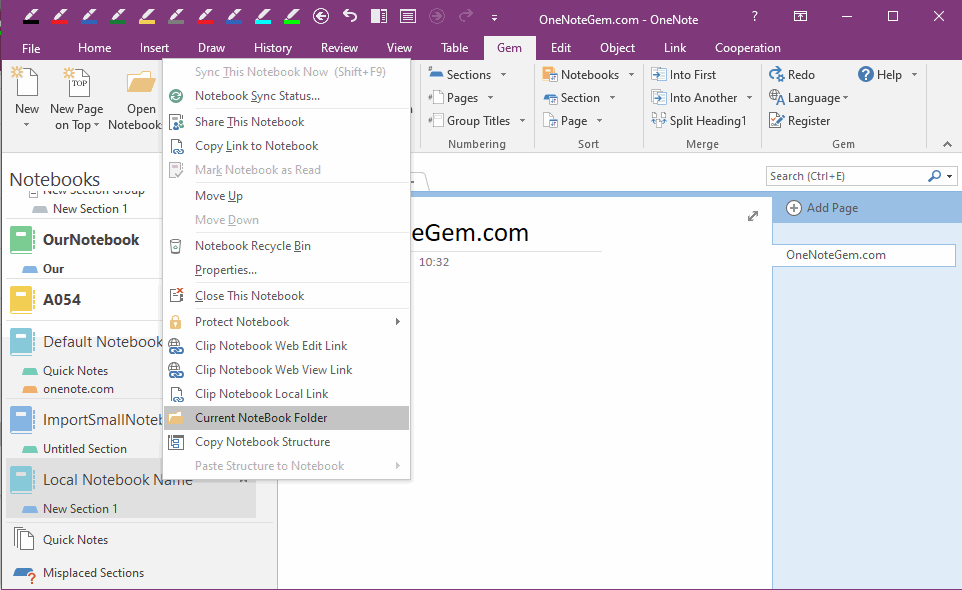
Right-click Menu: Current Notebook Folder
Download and install Gem for OneNote add-in.
Right click on a local notebook name, click the “Current Notebook Folder”.
Gem will using Windows Explorer to open the notebook Windows folder.
You can easy to copy the OneNote local notebook.

Related Documents
- How to Copy OneNote Current Paragraph Internal Link to the Clipboard?
- How to Transfer a OneNote Notebook from One OneDrive Account to another OneDrive Account?
- How to Convert a OneNote Section Group to a Notebook?
- How to Copy Local Link to the Clipboard for the Current Page of OneNote?
- EXE: Create a Windows Folder Directly as a OneNote Notebook from Windows Explorer


